Produkt - Ceník
Informace Partnerství Kontakt
Uživatelský manuál - přehled témat

How to create a playlist?
After clicking Create, first give your new Playlist a name1 and choose the desired aspect ratio2 (Landscape 16:9 (horizontal), Portrait 19:6 (vertical) or create a custom aspect ratio) and then click Create playlist3.

Playlist editor will open, from here you can:
Upload Media
Choose between different Media categories to add media files to your Playlist.
You can add already uploaded media to the playlist by clicking on the +1 button next to them in the Media management menu.
If the content you want is not listed you can upload it by clicking the Upload media2.

Set up Content Schedule
Once you selected media, you can adjust when it is going to be displayed. Click on the days of the week to enable/disable content display during those days.

Click on Whole Day1 button to customize time of the days, when you want the content to be visible.
A new menu will appear with more settings. You can learn more about Content scheduling settings in the dedicated article.
After setting everything up clicking OK, the end result should like this:
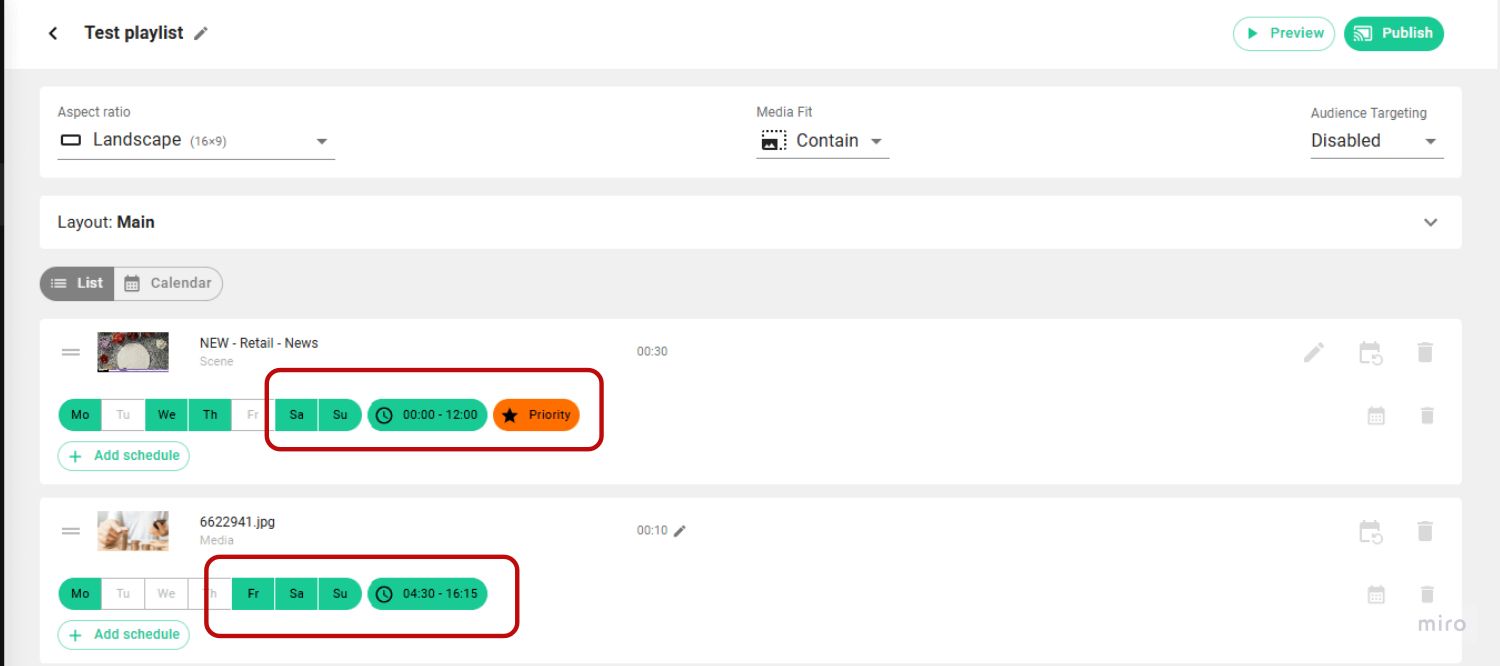
The highlighted boxes show all configured Playlist Schedule settings.
Preview and Publish the Playlist to your Screens
After you are done setting things up, you can click on:

Preview1 button to check whether everything looks like expected. A preview window will appear showcasing the Media you previously selected.

Publish2 button near the playlist to add it to selected screens by adding a tick1 next to them. Or click on the tag to publish the chosen media to all screens tagged with this tag.
You can also choose to schedule the publishing to show the media on a specific date later3. Specify the date using the calendar or by typing it in.

Playlist settings

In order:
- Click on the Pencil icon to edit the playlist.
- Eye icon to preview it.
- Screen icon to publish it.
- + icon to duplicate the Playlist. The copy will appear under the original playlist.
- Share icon to share the playlist between multiple spaces and manage its access settings.
- Bin icon to delete it. Click on Delete again to confirm.
