Uživatelský manuál - přehled témat
Multi-zone layouts
ScreenManager allows you to create a multi-zone layout for a screen in various ways. The most straightforward method is to use a playlist layout.
When defining a layout for a playlist, you can choose which content should play in each zone. This enables you to display video ads in the main zone and show current time & news in the "footer" zone, or showcase a restaurant menu in the main zone while displaying a queue management system on the side.
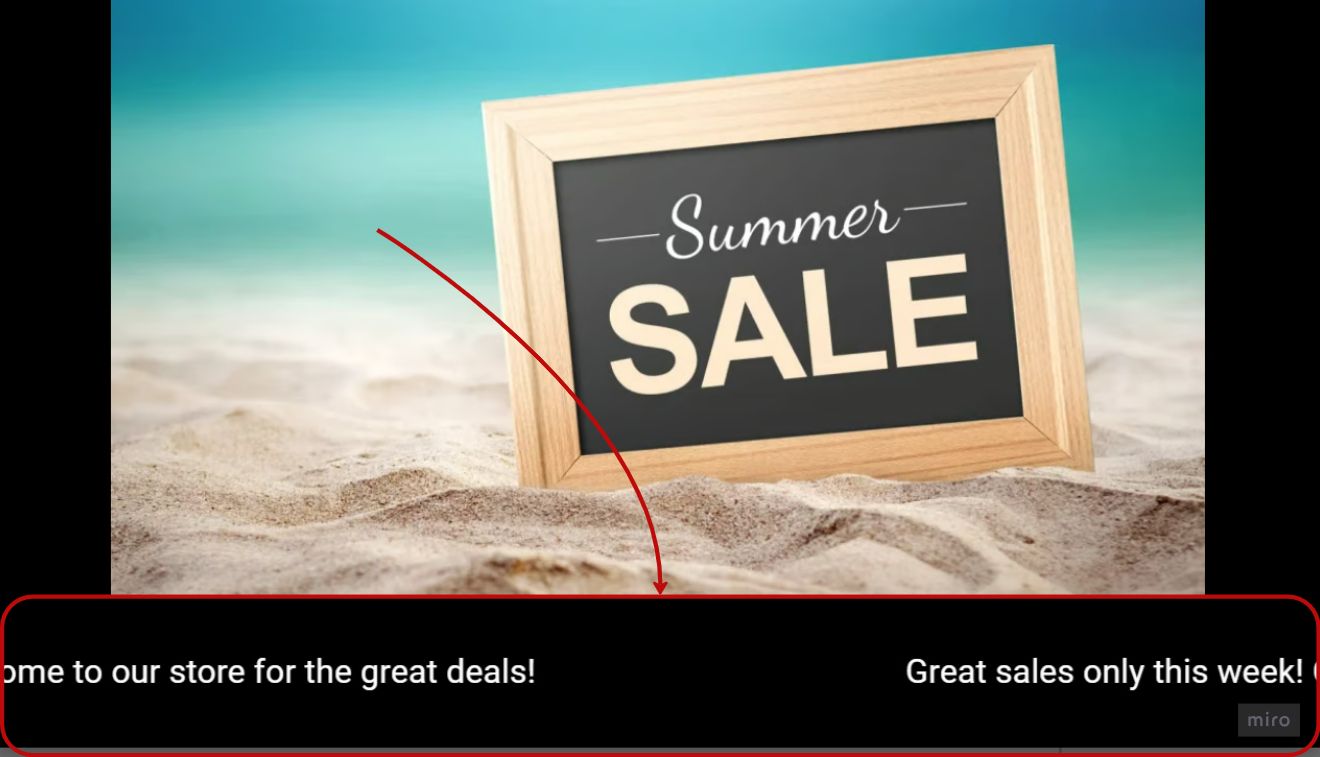
Let's learn how to use layouts with this example. The result will look like this:

Step 1: Create a Playlist
- Launch the ScreenManager CMS dashboard and navigate to the "Playlists" section.
- Click on "Create Playlist" and specify the aspect ratio. For a screen with a 16:9 aspect ratio, set the ratio of the playlist to 16:9.
Step 2: Select a Playlist Layout
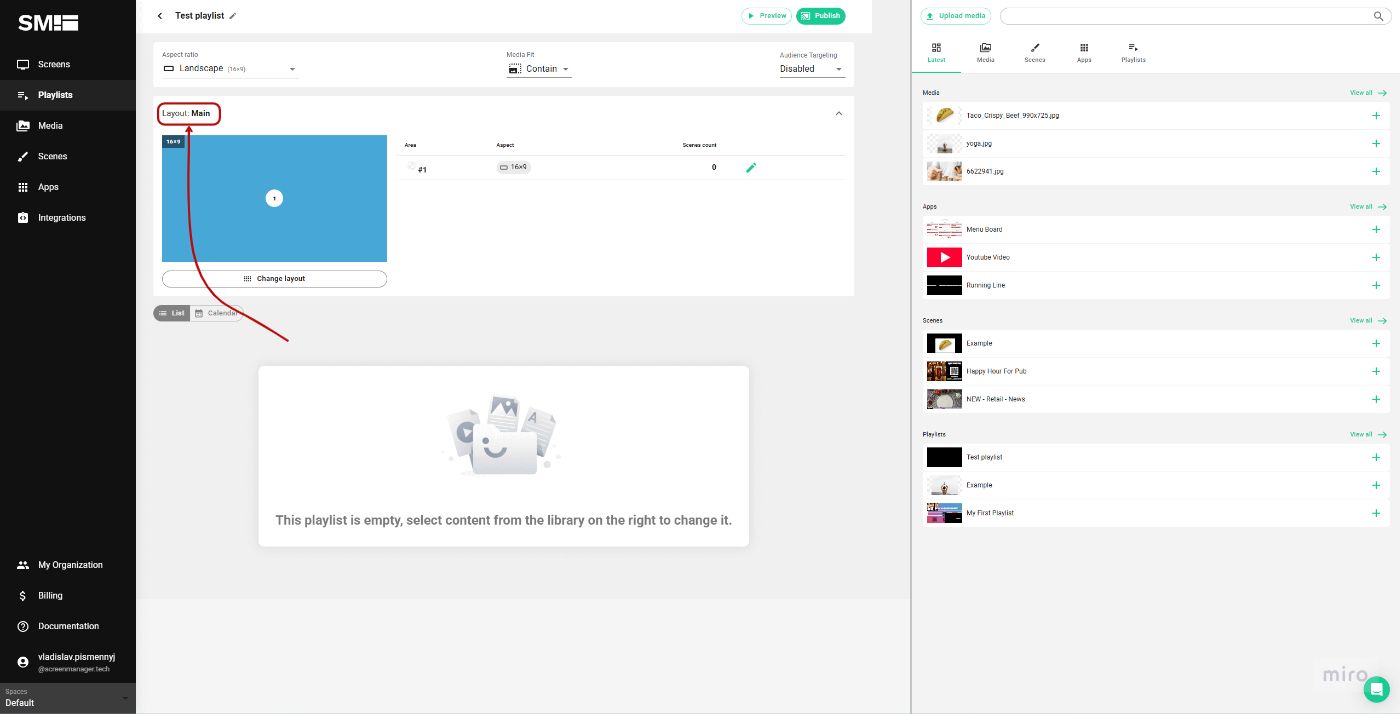
Choose a predefined layout from the available options or customize an existing layout to your preferences.
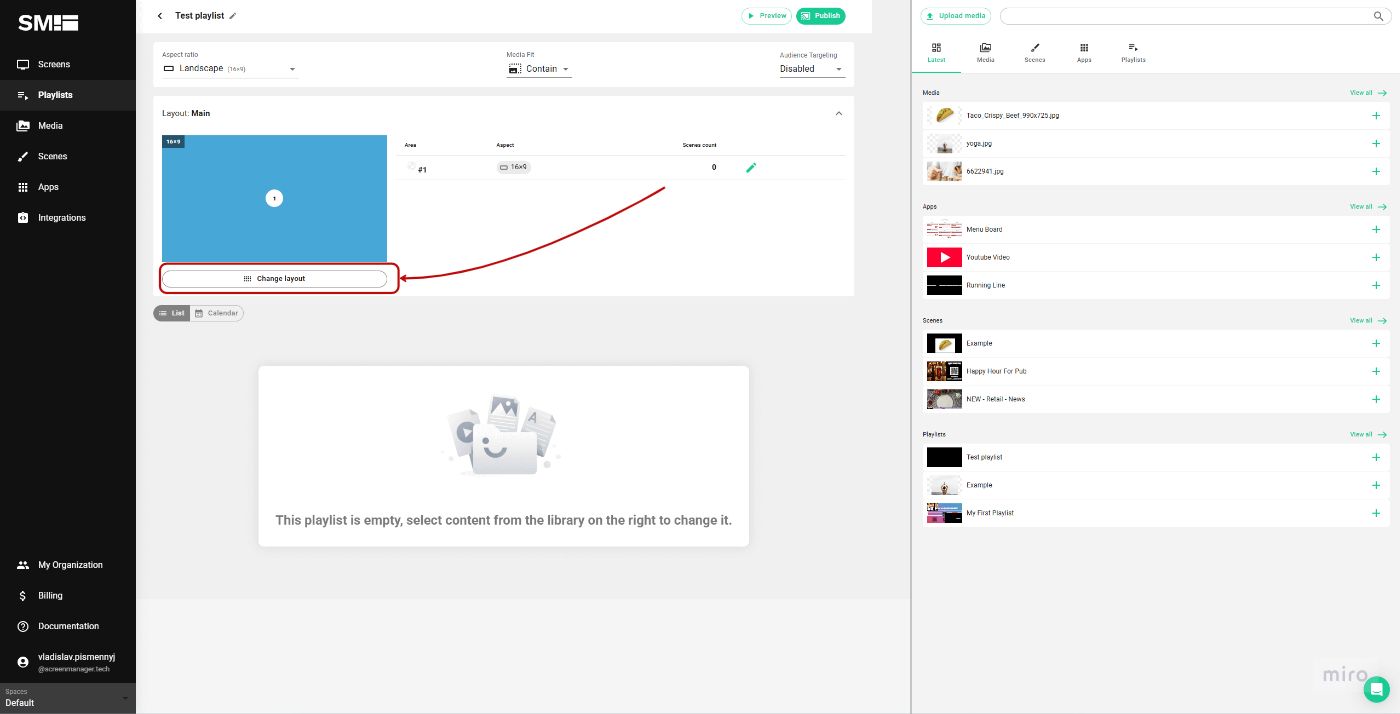
Each layout consists of zones where content is displayed independently. For example, you might have a layout with a main media zone and a ticker zone for news and current date & time.
Step 3: Add Content to Zones
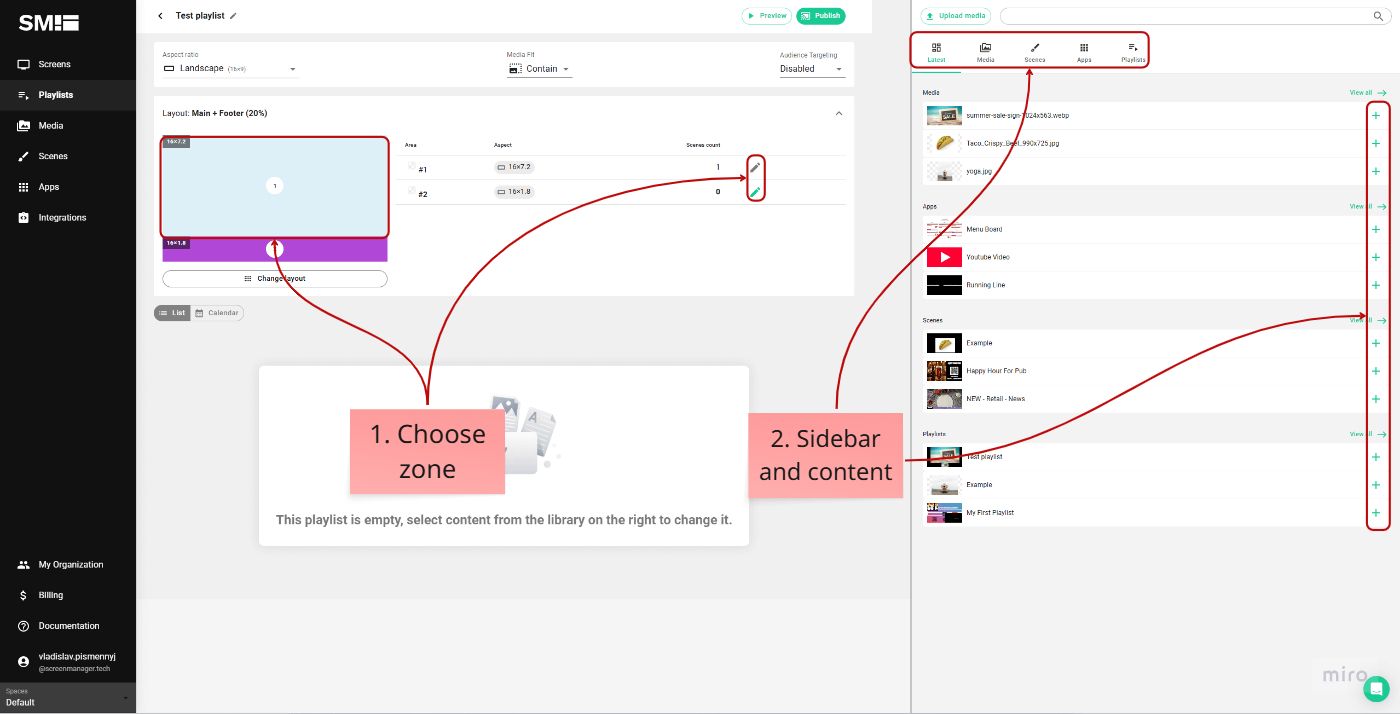
1. Click on the zone within the selected layout where you want to add content.
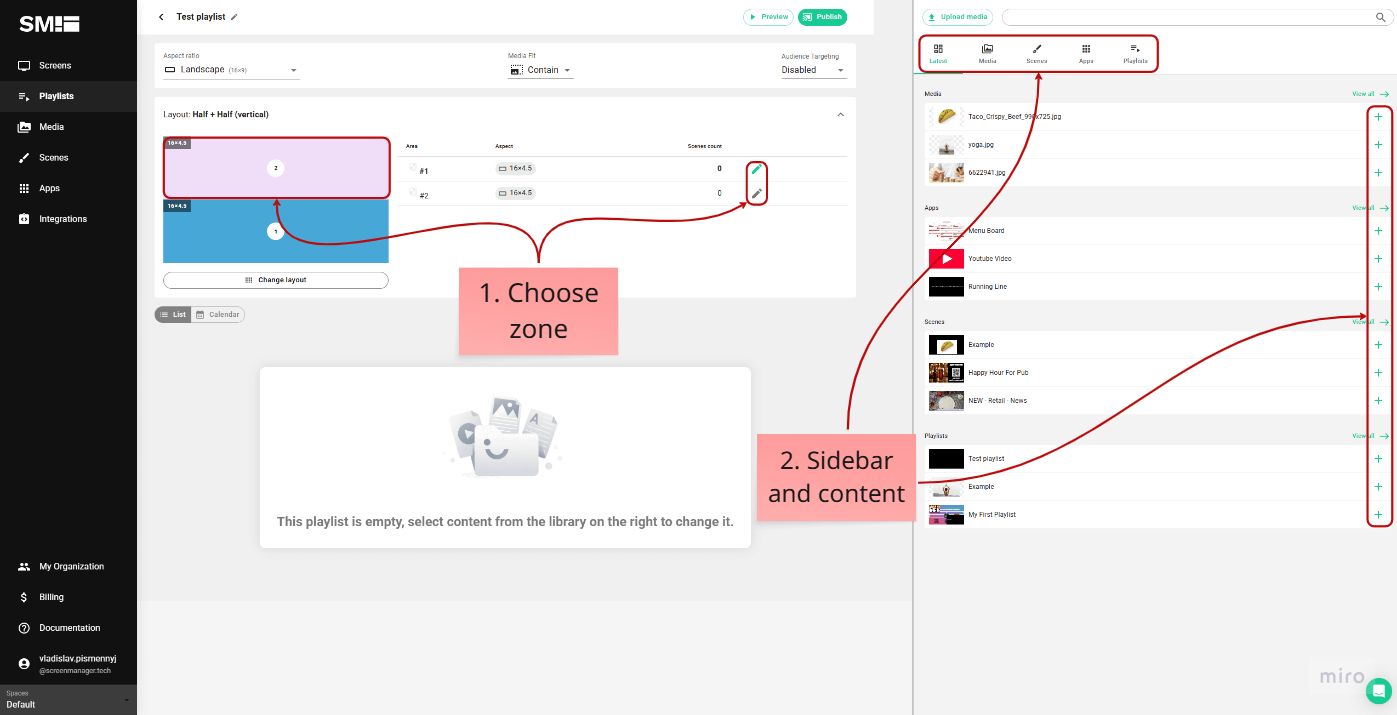
2. From the sidebar, select the desired content to add to the zone. If the content is already defined in another playlist, simply add the playlist to the zone.
Step 4: Create the Time & News Scene
In order to put the small black stripe to be bottom screen as displayed on the image below, we need to create a Scene.
A Scene is something like a canvas where you can mix various media types together.
You can learn more about Scenes here.
First of all, you need to change the currently edited area of the layout. To do so, click on the pencil or the area itself.
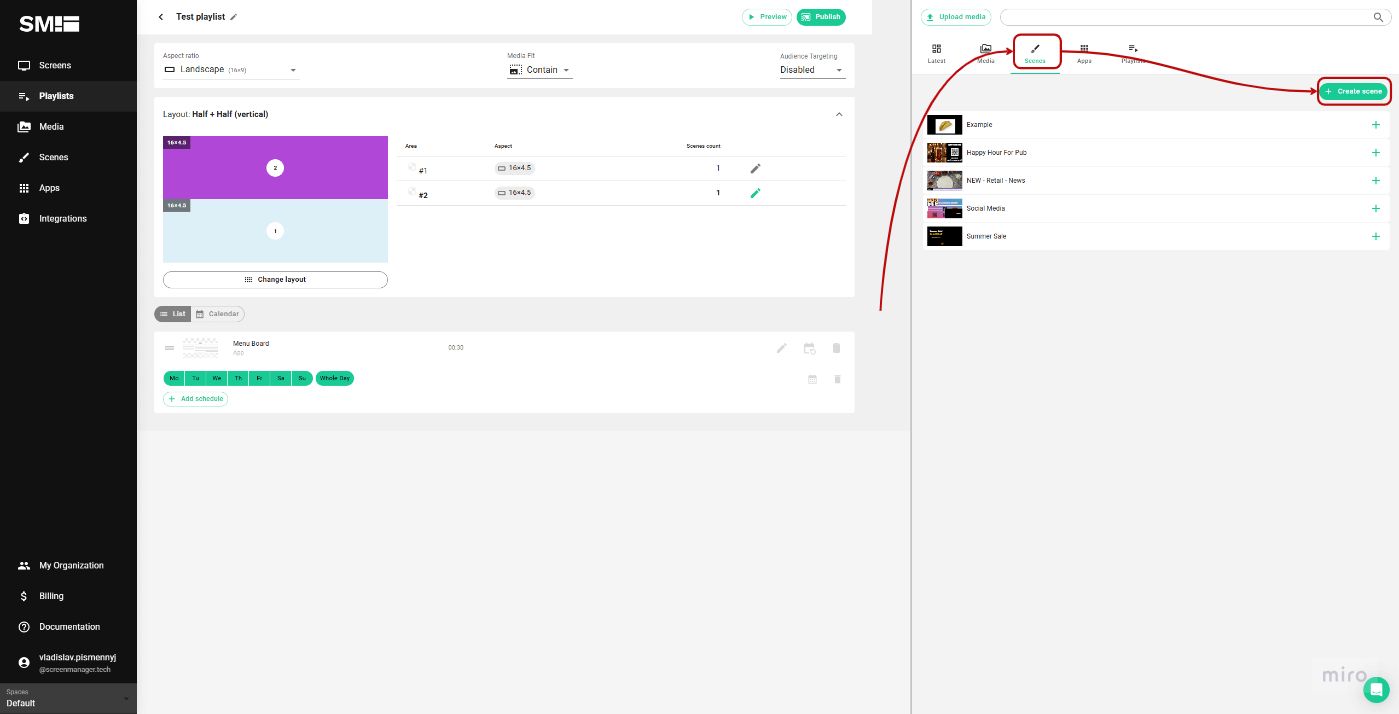
Then to create a new Scene in the desired aspect ratio (16x0.9), click on the "Scenes" tab and then on the "Create scene" button.
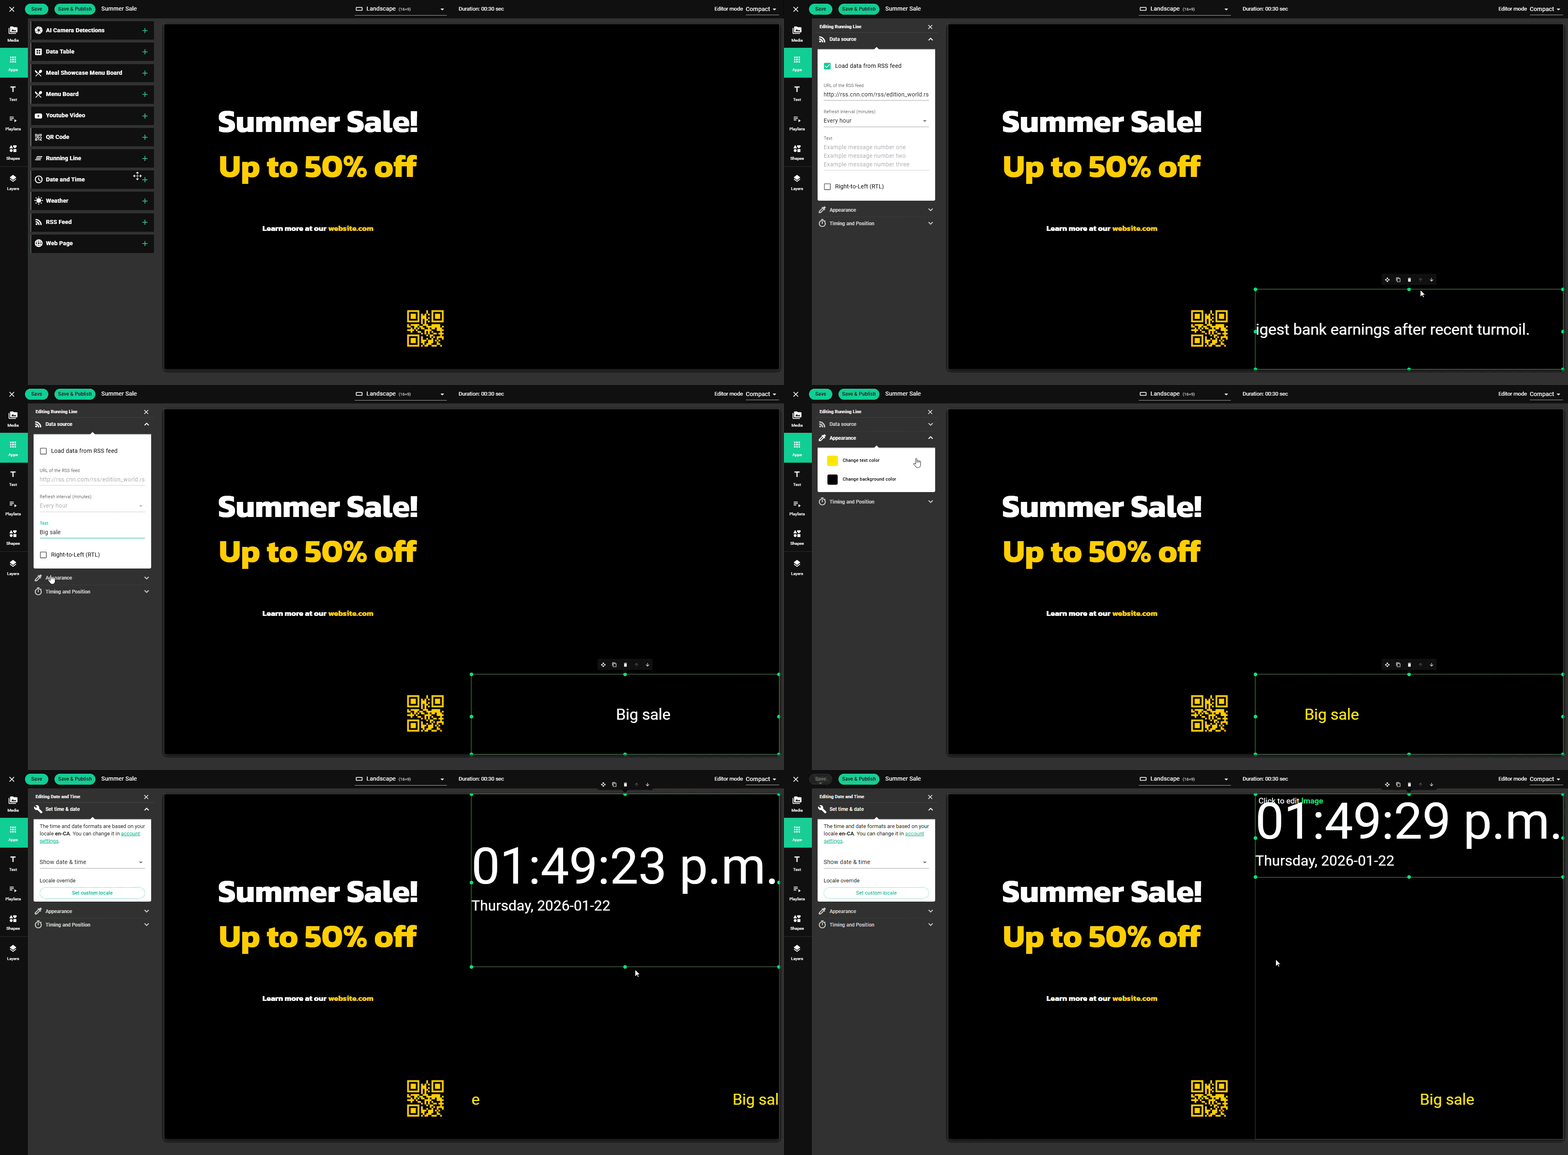
Design your scene with the desired content (e.g., Date & Time) and save it by clicking on the button "Save".
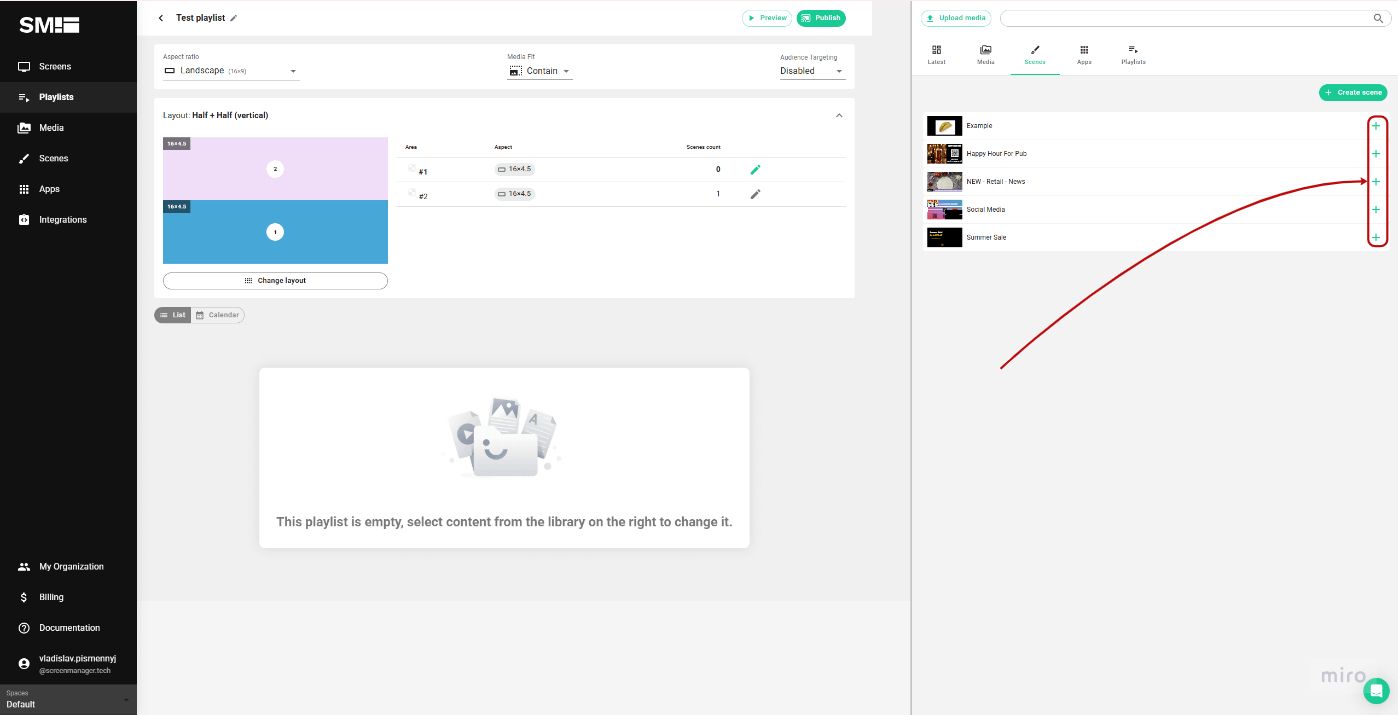
Step 5: Add the Current Time & News Scene to Playlist Zone
Add the created scene (e.g., Time & News) to the appropriate zone (e.g., Footer) within the playlist layout.
Step 6: Preview or Publish Playlist
Click on the "Preview" button to check the layout and content placement.
Once satisfied with the result, publish the playlist to your screen for display.
Tips and tricks
- Utilize nested playlists (a playlist inside another playlist): Use nested playlists to easily manage the content of the main zone of the layout.
- Use the 'Stretch' option in media fit settings: to ensure that the media contents of your playlists cover the entire area of the zone.
- Do not play multiple videos simultaneously without testing if your device can handle it. Cheaper devices might have performance issues playing more than one video at a time. Also, note that the video may be "choppy."
By following these steps, you can efficiently manage multi-layout screens in ScreenManager Digital Signage CMS, ensuring dynamic and engaging content delivery to your audience.
