Uživatelský manuál - přehled témat
What is a Scene?
In ScreenManager, scenes are powerful tools that allow you to design captivating visuals and set up intricate layouts for your digital signage screens.
Let's explore how you can leverage scenes to create dynamic content and multi-zone layouts that capture your audience's attention.
Scene vs Playlist
A playlist is simply a collection of content (media files and scenes) that play in a loop. While you can define a layout for the playlist, the design possibilities are quite limited.
In contrast, a scene offers a powerful visual editor akin to tools like Canva or Microsoft's Movie Maker. With a scene, you can design more complex visuals, allowing for greater creativity and flexibility in your digital signage content.
Scene Editor

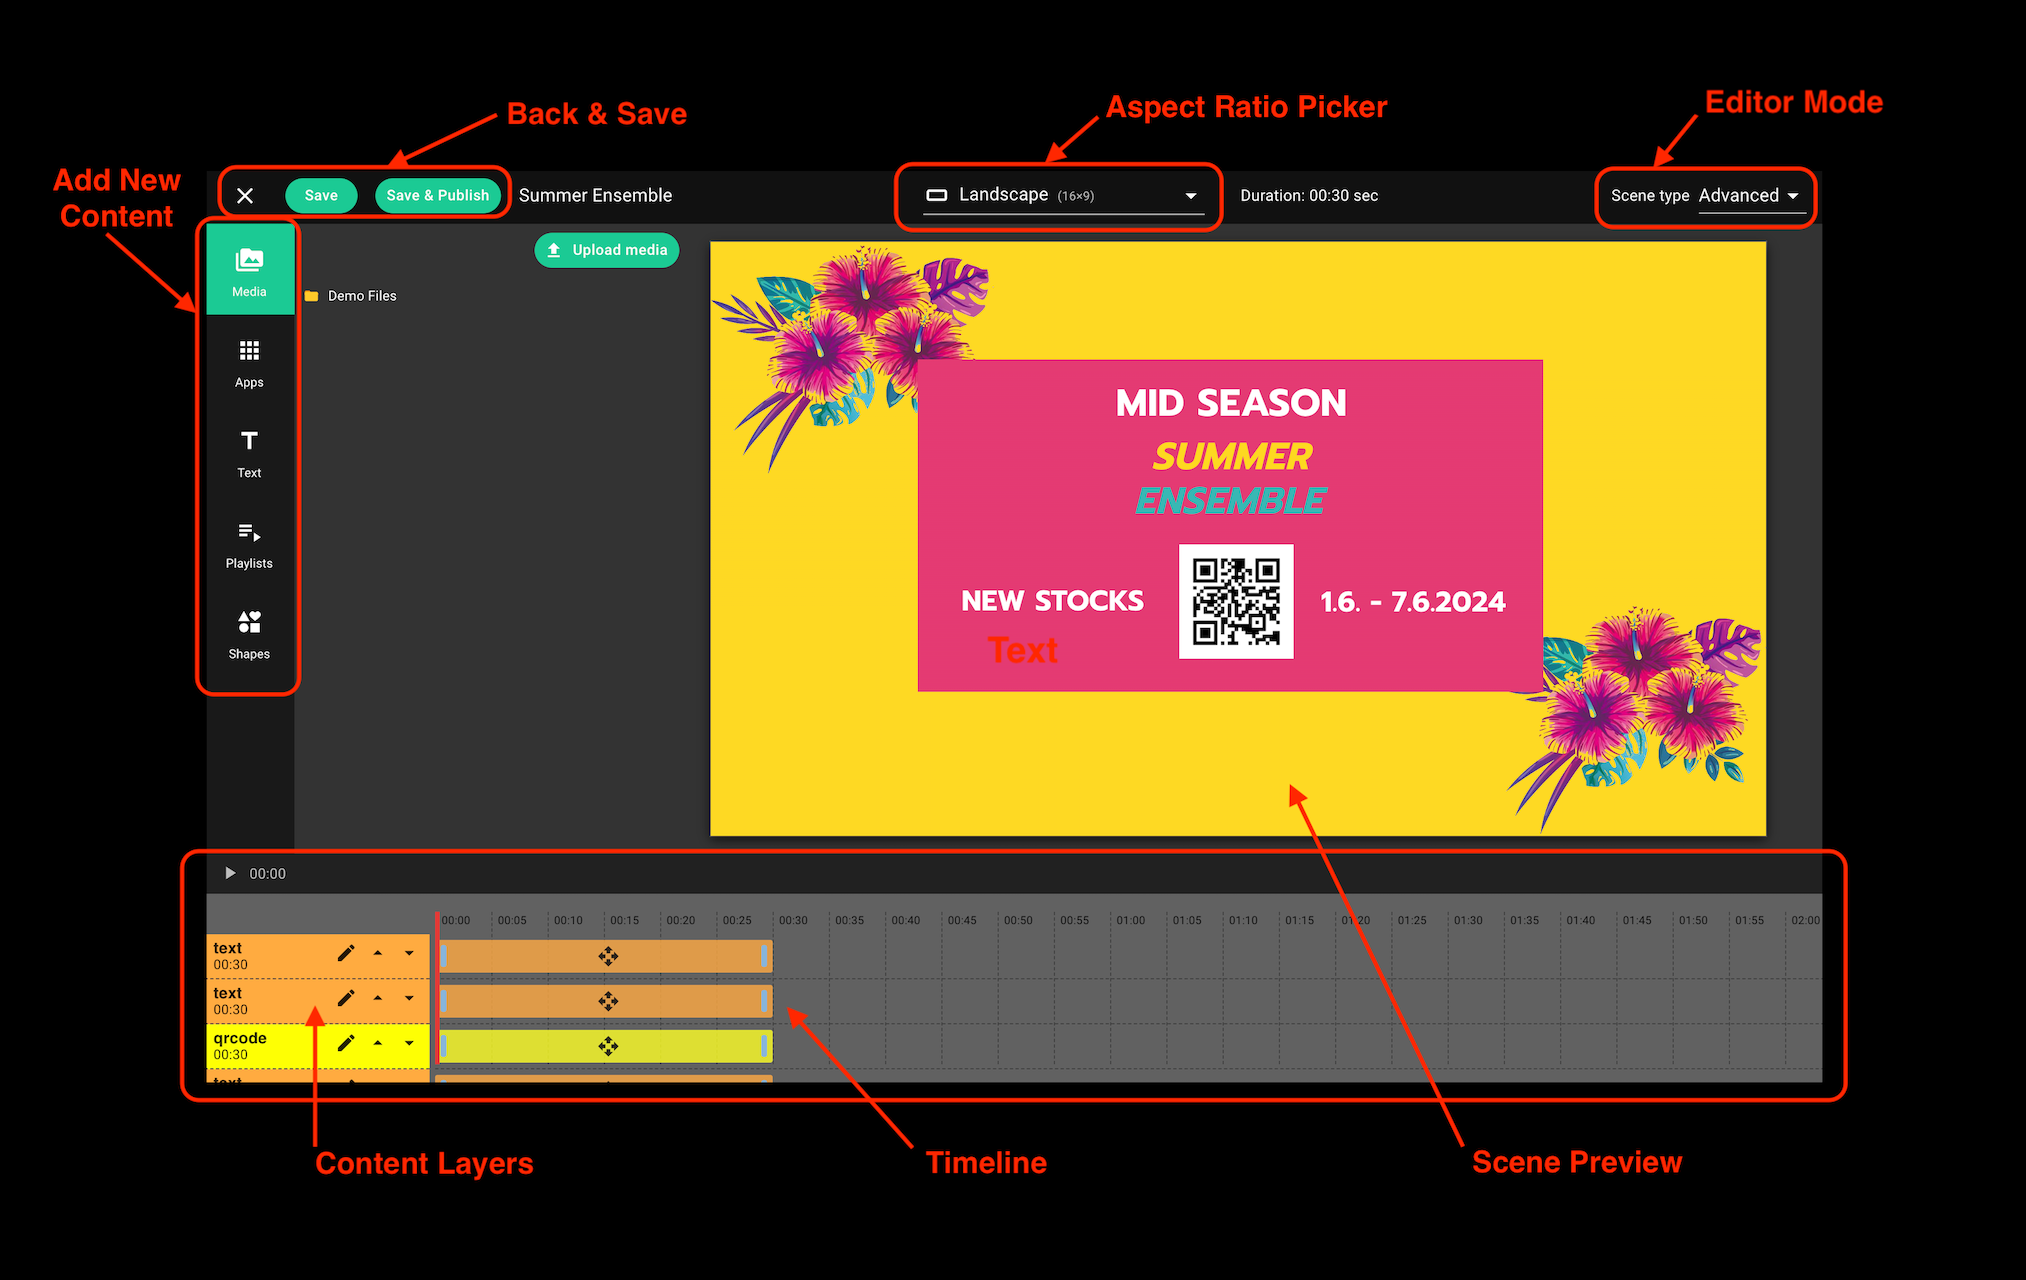
Back & Save
- Buttons to leave the editor or save the changes.
- Changes are not auto saved as in Playlist Editor
Editor Mode
There are two modes that you can use to design your scenes. This selection can be made at the top right corner of the scene editor.
- Compact mode
- In "compact" mode, all content is displayed for the duration of the longest element in the scene. For example, if one video is 10 seconds long and another is 30 seconds long, all elements will loop, and the scene will have a total duration of 30 seconds. This mode is ideal for situations where synchronization of all elements to the same duration is needed without detailed configuration.
- Advanced mode
- When "advanced" mode is selected, the user has full control over the duration of each element in the scene. Using the timeline, the exact playback duration of each element can be set. This mode is intended for users who need detailed and specific timing settings for their scenes, allowing for the creation of more complex and dynamic presentations. Note that this mode is not ideal for content where the duration is not known in advance such as Instagram Feed, RSS Feed or Playlists.
These modes ensure that the Screenmanager application provides users with both simple and advanced tools for managing and customizing scenes according to their needs. We recommend using the compact mode for most of the time for simplicity and ease of use.
Add New Content
With these icons, you can add new content items to the scene.
- Videos
- The videos should be in the top most layer otherwise the device might hit performance issues. Please, do not put any other content over the videos otherwise the Android players might put the video over the content.
- When a scene consists of multiple videos that play simultaneously, always test the performance on real devices. Some (even more expensive) Android players have performance limitations so the video can feel "choppy".
- Images, PDFs...
- Apps
- Web Page
- Current Weather
- Instagram Feed
- Clock
- Scrolling Text / Marquee (from RSS feed)
- RSS Feed (text & images)
- Menu Boards
- Playlists - this is handy to play more media files in a loop or to schedule the playback time of media files. With this you can create quite complex layout in just a few clicks.
You can add specific media to scenes. These media can be added using the drag and drop feature, which means you simply drag and drop them into the scene editor. This intuitive method allows for easy and quick content addition, increasing efficiency and making it easier to work with visual elements in your scenes.
Aspect Ratio Picker
You can change between Landscape (16x9) and Portait (9x16) aspect ratios. You can also create a custom aspect ratio for more advanced use cases.
Scene Preview
Click on items inside of the preview to edit them. When one item is on top of another, you can use the Layers view (last icon of the left sidebar) to select that item.
Timeline
Here's an overview of all the items within the scene. Each item is on its own "layer." You can adjust the order of the layers by using the small up and down icons to bring the item forward or backward.
You can also modify the timing of the elements. However, we advise not changing the timing of content items when one of them is a Playlist.
Common use cases
By leveraging scenes in these common use cases, you can create immersive visuals that effectively convey information, engage your audience, and enhance the overall user experience. Whether you're in retail, corporate, hospitality, education, entertainment, or healthcare, scenes offer endless possibilities for creating compelling digital signage content.
1. Split the screen into multiple areas (zones)
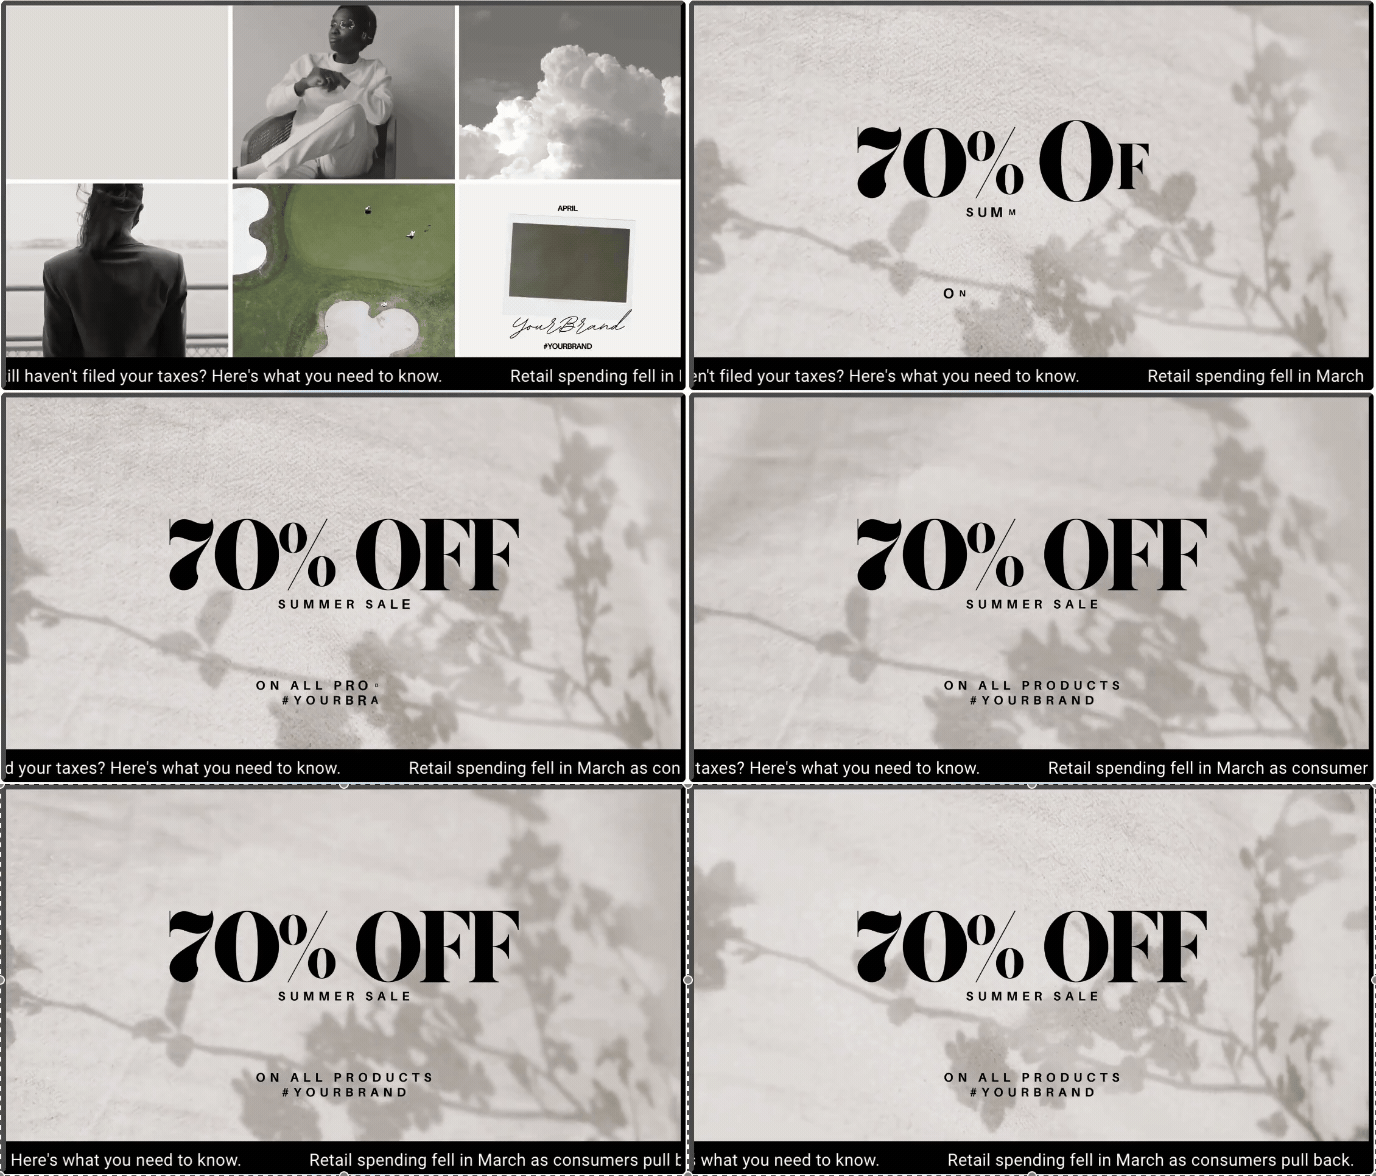
Imagine that you want to divide your screen into multiple zones. Main zone would play videos in a loop and there will be a footer with current time & news at the bottom. Something like this:

How to do this?
- Create a playlist with all the content you want to play in a loop
- Then create a scene
- Add a new "playlist" item to the scene and adjust its position. Click on the Select playlist button and select the playlist you created in the 1. step
- Add another item, this time "Scrolling Text" and adjust its position
- Click on "Save changes" and click on "Go Back"
- Click on the "Publish" button and select screens where the scene should be published to
- Go to the Screens dashboard, find the screen(s) where you have published the scene and click on the Preview (eye icon) and check the result
